Archive
Elemental Boss Strats: Healing Valithria
Valithria is an interesting encounter in Icecrown Citadel and undoubtedly, one that will quickly become a favourite of your healing team. As a shaman, you may find yourself asked to heal during this fight. For us, as an example, we run with three main spec healers (one of whom respecs for some two healer fights). The DPS requirements of Valithria are not high so we prefer to utilise four healers. The fourth? You guessed it; the elemental shaman.
The idea of the encounter is very simple. You have to heal Valithria back to full health while dealing with several waves of adds that spawn. These adds will either try to kill your raid or to harm Valithria herself. As the fight progresses, the waves come faster but the mechanics of the encounter do not change.
In this guide, I’ll talk you through the basics of both healing or DPSing this encounter for the main spec elemental shamans out there.
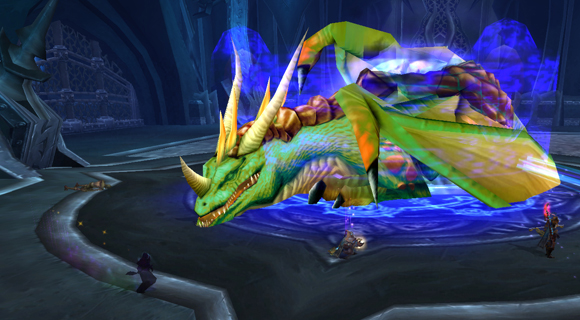
The above screenshot shows Valithria’s room. As with most of our tactics, we use the floor markings as an indication of where our raid should be positioned.
You will find four Risen Archmages channelling on Valithria. To begin the encounter, these must be engaged and killed.
Positioning.
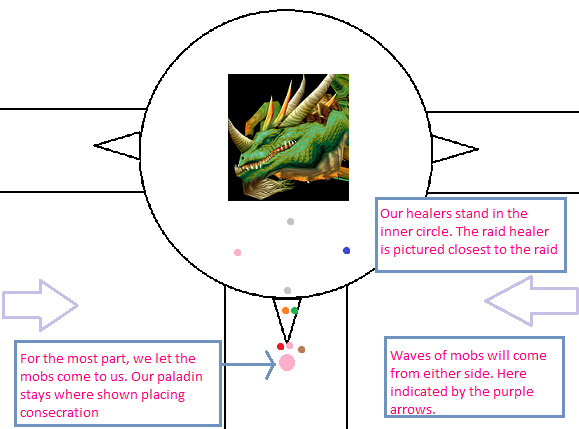
The above diagram shows our general positioning for Valithria. Our healers all stand in the inner circle. Two of these healers will be going through the portals and into the dream state (more on this later). To make reaching these portals easier, we have one healer take the right side and one take the left (and stick to these sides once in the dream state.)
We use one tank for this encounter and as such, agro can be trying. Our paladin tank stays in the central area as shown as for the most part, we let the mobs come to him. This is somewhat dependent upon the adds and I’ll detail these in the next section.
Part 1: Valithria as a DPS
The Adds
Essentially, there are six different types of adds that will spawn and rush either your raid or Valithria. They have different abilities of their own and as such, have a different kill order priority.
Blazing Skeleton
These have two abilities:-
- Fireball
- Lay Waste
Fireball
- Standard single target nuke
Lay Waste
- 12 second channel
- Can not be interrupted
- Damages all enemies including Valithria
(Image courtesy of wow.com)
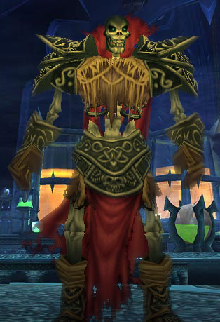
The lay waste ability is nasty as not only will it hit all members of your raid, but it will hit Valithria too. Due to this ability, the blazing skeletons are the DPS priority.
Suppressor
Suppressors spawn in waves of 3 or 4 and have no agro table. Rather than run to your raid, they will run to Valithria. They have one ability:-
Suppression
- Channelled
- Reduces healing received by the target by 10%
We have one or two melee take these adds as their kill priority. They have low hit points and can easily be dealt with by a couple of melee.
Risen Archmage
These adds have the most abilities of all:-
- Column of Frost
- Frost Bolt Volley
- Mana Void
Column of Frost
- Instant cast but with two seconds delay before the spell hits
A frosty coloured circle will be marked on the ground. Two seconds later, a frost spike will erupt and throw any raid members stood on it, into the air. It’s completely avoidable, however.
Frost Bolt Volley
- Two second cast
- Can be interrupted
- Raid wide not single target
Should this be allowed to cast, it will hit all members of your raid for frost damage along with slowing them. It can and should be interrupted however.
Mana Void
- Instant Cast
- 6 yard radius
This places a purple void zone on the ground, draining the mana of anyone standing in it.
(Image courtesy of wow.com)
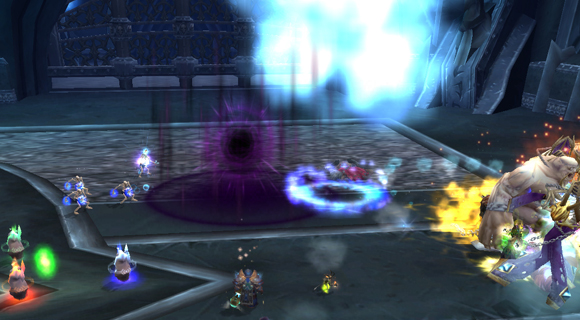
The screenshot above captures both a column of frost and a mana void.
Blistering Zombie
These have a stacking debuff that reduces your tank’s armour. As such, having your ranged DPS dispatch these as fast as possible is a good solution. They have two abilities:-
- Corrosion
- Acid Burst
Corrosion
- 6 seconds duration
- Can stack upto 5 times
Whenever the zombie lands a melee swing, the target will take around 2k nature damage every three seconds and suffer an armour debuff of 10%. This can stack to 5 and is particularly nasty on your tanks as the waves come faster later in the fight.
Acid Burst
Much as it sounds, these zombies explode on death dealing nature damage to all around them and applying a nature based DoT.
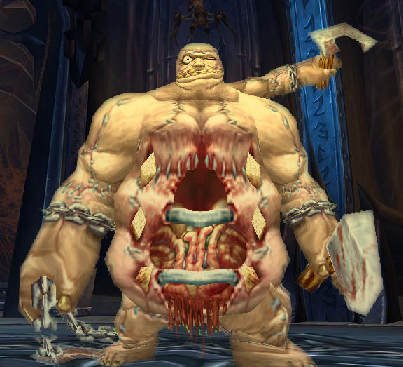
Gluttonous Abominations
While these have a fair amount of hit points, they have the weakest abilities.
- Gut Spray
- Rot Worms
Gut Spray
- Instant cast
- 8 yard radius
This deals 2000 nature damage per second and increases physical damage taken by 25% for 12 seconds.
Rot Worms
As the abomination dies, it spawns approximately 7 rot worms. These can be AoE’d down.
Handling the Adds
Our melee and ranged DPS have mostly different priorities during this encounter. As a ranged DPS, my priorities are normally as follows:-
- Blazing Skeleton – pure DPS on this
- Blistering Zombies – DPS and frost shock
- Risen Archmage – help interrupt the frost bolt volley and DPS
- Gluttonous Abominations – pure DPS
- Rot Worms – AoE
- Suppressors – Only if there is nothing else up, throw some chain lightnings at them
You may find yourself needing to switch targets depending on what the new waves of adds consists of and this is something to be aware of. If you use the positioning I detailed initially, you can use a magma totem to good effect (if you’re able to use fire DPS totems of course.)
There is no doubt that the blazing skeletons should die first and these will undoubtedly be your primary DPS target when alive. Whether your second priority is the arch mage or the zombies may depend on your raid setup. The best tactic for the zombies is to kite them and have all your ranged DPS burn them down. However, it’s imperative that the arch mage has his frost bolt volley interrupted also. For us, we have one melee (our enhancement shaman), switch to the arch mage instantly and interrupt the volley. This leaves me comfortably burning the zombies with the other ranged DPS. Should you be low on interrupts (or have slack melee that fail at them), it may be better for you to focus on the interrupts as soon as the arch mage spawns.
Regarding the suppressors – these need to die promptly due to their channelled spell. We run quite melee heavy and they are dispatched very quickly by our melees. With different setups, you might need to be switching to these earlier and certainly before the abominations (as these are generally quite easy to deal with). In this sense, you will need to be quite flexible in what you’re DPSing and setting priorities based upon your own raid setup.
The waves of adds will continue in this way until Valithria is healed to 100%. Remember, the speed at which they come does increase over time.
Part 2: Valithria as a Healer
There are two potential roles you maybe asked to fill on this fight. The first is to focus on Valithria and enter the dream state when the nightmare portals spawn. The second is to stay outside, healing both the raid and Valithria. The most likely role if you are not a main spec healer, is to enter the dream state.
Nightmare Portals
These are summoned by Valithria and on ten man mode, two healers will be entering the dream state.
Periodically, you will see green portals (red on heroic) spawn around her. Clicking on these will port you to the “dream state”. This is a version of Valithria’s room occupied only by dream clouds. These are bright green clouds floating around her room.
Some guilds have their healers stack together in the dream state and multiple players can be affected by the buff from the same dream cloud. We don’t do this. We have one healer take the right hand side and one take the left hand side. This ensures that they have more than enough dream clouds to stack the buff high.
Dream clouds are activated by proximity. As you can “fly” in the dream state, depth perception can be difficult to judge (that is to say, while it may appear to you that you’re on top of a cloud, you can be feet under or above it.) Flying into the cloud gives you a buff called Emerald Vigor
Emerald Vigor
- Drastically increases mana regeneration
- Increases healing and damage done by 10%
- 35 second duration
- Can be stacked to 100
This buff mechanic is what allows you to heal Valithria back to full health.
The Start of the Fight
If you are assigned to heal Valithria, then you can start the fight by casting Earth Shield on her. If you’re using the glyph of lesser healing wave this will allow your Lesser Healing Waves to heal for more. How you initially heal her (prior to the nightmare portals) maybe somewhat dependent upon your gear. I use a combination of Riptide every time it is off cooldown and Healing Wave. Be warned however, while healing wave heals for considerably more it will burn through your mana and if you have poor restoration gear, you may wish to consider sticking to Lesser Healing Wave until you have the buff from the dream state.
The Dream State
When the portals spawn, jump in as soon as you can. Your aim in here is very simple. Fly into as many clouds as possible (they will vanish if you have “hit” them correctly). Each time you do so, you’ll gain one stack of emerald vigor. You want to stack this as high as possible before you automatically get ported back into her room. The clouds have a very fast respawn so you won’t run the risk of running out of them. Be aware that because you’re flying and as you have to be close to the clouds to activate them, perception can be difficult in here.
You will gain access to the dream state for 15 seconds a time before you are ported back to Valithria’s room.
Upon being ported back, commence healing her. If you were initially using lesser healing wave, you should now switch to healing wave as the mana regeneration gained from emerald vigor should stop you from running out of mana.
The idea of the buff mechanic is to never let your stacks drop off. While this won’t necessarily mean a wipe on normal mode, it’s good practice for hard mode when losing your stacks will definitely result in a raid wipe (the waves of adds will become too overwhelming.)
Conclusion
Healing
Valithria is a fun and relatively straight forward encounter. She can, however, be a little intimidating for the elemental shamans out there who are asked to heal. Never the less, once you have gotten used to activating the clouds in the dream state and keeping up your buff, you’ll find this encounter easy. Be aware that Valithria can’t be healed by spells that have a group or raid wide mechanic. For shaman’s this includes chain heal so stick to your single target heals. Start with lesser healing wave if necessary and switch to healing wave once you have the buff.
Totems
I have heard of people using resistance totems on Valithria, so be prepared to do so if asked. We don’t find this necessary on either normal or heroic mode however. You can use your normal totem setup.
Heroism
This is best used when both healers have a good stack of the buffs (so towards the end of the fight). Obviously, to make the most of it, you want to be popping it just as you exit the dream state.
DPSing
If you’re DPSing it, keep your wind sheer and frost shock close at hand for interrupting the archmage and for slowing the zombies. Chain lightning can be very useful on the suppressors, though these are generally dealt with by your melee.
Totems
If you use a positioning similar to us, magma totem can be used to full effect (though wading in and out to place the totem down can become extremely annoying.) I use either totem of wrath or searing totem and, when placed centrally with the tank, fire nova can be used for the rot worms. As I mentioned above, I have heard of guilds using resistance totems on this fight though we don’t.
Heroism
Heroism should be timed to be of best use to both the healers and the DPS outside. As the fight progresses, you get increasing amounts of adds and popping heroism can be a way to catch up. You must ensure that the healers also benefit from this; they should have just exited the portal when it is used. Make sure there is good communication between yourself and the healers in regards to timing your heroism.
Valithria shouldn’t take you long to learn, particularly in comparison with Sindragosa or the Lich King. She also drops a nice caster cloak for anyone lacking hit 😉
